Monday, 2 July 2012

Happy Birthday Superstar!

My gorgeous niece turned 15 this weekend and to celebrate we threw a big party in our garden (I think our house has become The Party Garden - I said 'palace' but we're much more rugged than that). My gift to her was, as usual, a birthday cake.
Last year I made her a pair of Doc Martens and this year wanted to make something a little more abstract that would hopefully look better than last years haphazard work. She told me her favourite colours were dark purple and green and I decided to work with the purple.

This cake gave me reason to finally visit A Tiny Bit Marvellous, a local cake decorating shop and I am super thankful for all their help and encouragement.
The party was filled with friends and family, food and fun! The cake was a hit and (after a previous night of mayhem leaving me ready to give up cake decorating for good) I was very pleased with my (slightly off centre) creation. (Please excuse my terrible photography).

The cakes I baked were chocolate (top layer) with a chocolate buttercream and marble (bottom layer) with vanilla buttercream. I filled the centre of each cake with buttercream and a layer of raspberry jam for the marble cake.


Happy Caking!


Sunday, 13 May 2012

Mother's Day Lunch

This Mother's Day we've opted to host lunch at our house to save the $$$ we spend at restaurants every year. My gorgeous, fellow-foodie aunt has been excited making home made jam to serve with freshly baked scones and honey murcott cake - yum!! Being lunch time I felt we needed something savoury, and with this freezing weather hot was definitely the way to go.
Brainstorming, I was tossing up between finger food/high tea mini-quiche and spinach dips and a warm meal when the angels above heard my call. We recently house sat for a friend of a friend and she had passed on a thank you gift for us. Last time we house sat she gave us Nigel Slater's Tender Volume 1: a cook and his vegetable patch, AND Volume 2: a cook and his fruit garden. I absolutely 150% recommend these books, they not only give delicious recipes but suggestions on how to grow, store and cook (almost all) vegetables and fruit, and which herbs, spices and other flavours bring out the best in each of them. I've used it a thousand times to pick spices for soups and roasts to give old favourites new twists, and learnt to cook with vegetables I'd never tried before. Nigel Slater: you are a god.
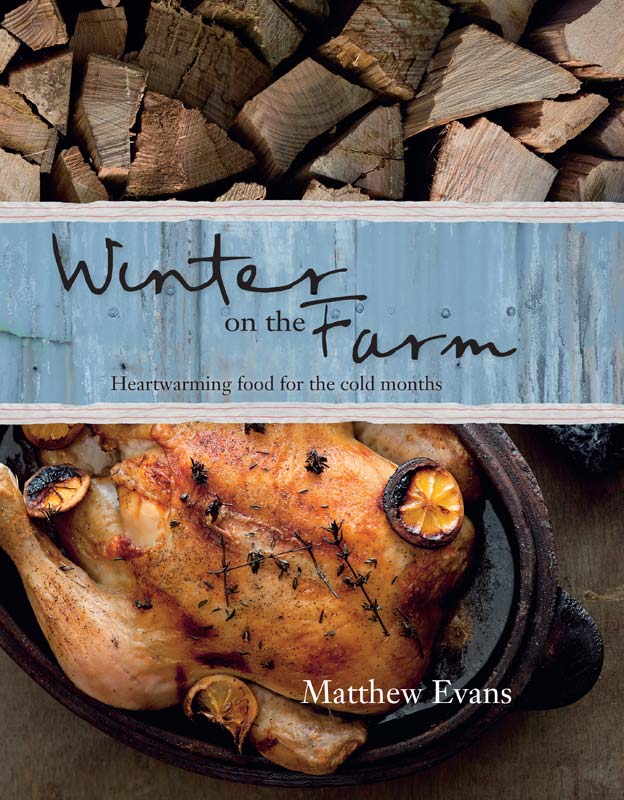
Anyhow.. After this incredible gift last year I was quite excited to open the gift she had sent us this time. We received a beautiful lime and eucalyptus candle (I'm not much of a candle person but this scent is incredible) and Matthew Evans' Winter on the Farm.
Now lets just recall my situation: freezing mother's day lunch coming up. Solution? Winter on the Farm!


This book is delightful. It offers mouth-watering breakfasts, heart-warming desserts, warm drinks perfect to have while snuggled under a winter rug, a selection of hearty meat dishes and a fantastic range of vegetarian soups, stews, and all the other winter delights you need to stay warm.

The recipe that captured my attention was Paprika Braised Chickpeas with Kale. This will be served to warm our fingers for lunch. It takes quite a while to make, with chickpeas needing soaking overnight and two hour long simmering times, but is definitely worth the result.

Paprika Braised Chickpeas with Kale
from Matthew Evans Winter on the Farm
500g dried chickpeas, soaked overnight, rinsed and drained
10 large kale leaves (or silverbeet if you can't find any)
1 tbsp olive oil
3 large onions, diced
2 bay leaves
1 small piece cinnamon stick
6 garlic cloves, roughly chopped (I reduced this as my grandmother isn't keen on garlic)
3 tsp sweet paprika (I used Spanish)
1 tsp ground cumin
400g tinned chopped tomatoes
1 tsp salt
2 tbsp extra virgin olive oil

Put the chickpeas in a large saucepan, cover with water and simmer for 1 hour, or until they are just starting to become tender, but not cooked through. Drain well, reserving the cooking liquid and set aside. Strip the soft green part from above the the ribs of the kale leaves and set aside.
Heat the olive oil in a large saucepan over medium heat. Add the onion, bay leaves and cinnamon and cook for 10-15 minutes, or until the onion starts to brown. Add the garlic and cook for 1 minute, then reduce the heat, add the paprika and cumin and cook for 30 seconds, stirring constantly and being careful not to scorch the spices. Add the tomato, kale and 500ml water and stir to combine.
Add the chickpeas and salt to the pan with just enough of the reserved cooking liquid to cover. Bring to boil, then reduce the heat to low, cover and simmer for 1 hour or until the chickpeas are buttery soft.
Alternatively, you can cook this dish in a 140 degree oven for 2 hours.
Just before serving, season with salt and freshly ground black pepper and stir in the extra virgin oilve oil. Serve warm with turkish bread.

I've been dying to use my new casserole dish so opted to make a double batch of this stew, with one in the oven for 2 hours and one over the stove. I found the one cooked in the oven (pictured) had softer chickpeas which I preferred, but both were delicious.


Then I came across Matthew's Cardamom-scented Rice Pudding with Baked Rhubarb and I knew this was the book for me. This is the recipe to highlight my Finnish roots thoroughly. Every christmas I make Finnish rice pies en masse which involves enormous amounts of rice porridge. I always enjoy any left overs warmed with prunes or jam - yummmmmmm. Finnish delicousness is often coated in cardamom, and my grandmother makes rhubarb everything - I have got to try this!
I initially considered making this for mum for breakfast but it takes a little while to cook so I chose to serve it alongside my stew at lunch time, to compliment my aunt's honey murcott cake and scones (which were amazing, by the way). We were far too stuffed after stew, tea and cake to find room for the pudding so left it aside and had it later in the evening. We didn't bother re-heating it and it tasted delicious cold.


Cardamom-scented Rice Pudding with Baked Rhubarb
Rhubarb
1 small bunch rhubarb, trimmed and cut into 3cm pieces
70g soft brown sugar
Preheat oven to 220 degrees. Arrange rhubarb in a single layer in a baking tray and spinkle over the sugar. Bake rhubarb for about 10-15 minutes, or until tender. Set aside until ready to serve. Baked rhubarb will keep stored in an airtight container in the fridge for up to 7 days.
Pudding
2 1/2 cups milk
1/2 cup pouring (whipping) cream - I used thickened
finely grated zest of 1 lemon
5 large cardamom pods
1 vanilla bean, split lengthways
90g raw sugar
80g short-grain white rice
Place milk, cream, lemon zest, cardamom and vanilla bean and seeds in a large saucepan and bring to a simmer. Turn off the heat and leave to stand for 15 minutes to allow flavours to infuse. Discard the vanilla bean and pour the mixture into a 20cm round casserole dish. Add the sugar and stir until it dissolves, then stir in the rice until well combined.
Bake the pudding for 1.5 hours, or until cooked (stir occasionally if you don't like the skin that forms on the top of the pudding).
If the pudding seems a bit runny let it cool and it will thicken. 
Serve the pudding warm with baked rhubarb.


Mothers Day, an absolute delight with the beautiful women in my family (and some of the men as well)!


While finding pictures of this divine cookbook I've found a link to Matthew Evans' blog: http://www.sbs.com.au/food/blog/111942/Gourmet-Farmer check it out!

Saturday, 5 May 2012

Children's Birthday Parties!

Aren't they just the best?
I had an absolutely fabulous time celebrating my nephew's first birthday this weekend. After pouring rain all week the park party was relocated to my parents house which meant it was myself and ma doing the catering - making children's party food, is there a greater joy?
We made and played with playdough, bubbles, balloons. We had a fairy castle, and lots of dancing and bands jamming (for the big kids!). 
Ma and I had so much fun filling bowls with lollies, finding party pies, sausage rolls, mini hot dogs and buns, quiches, mini pizza slices and so much more! 
I had the enormous privilege of being asked to create his first birthday cake, a second to the cake being provided by another aunt. This meant busy me, so most of our other mini-child-sized food was bought but still super yum and super fun!

First birthday cake. Boy. Father is a truck driver. Is there any other option? Train cake!
It began as a disaster. I baked on Thursday night which ended in me going to bed very grumpy with a pile of mushed up cake crumbs in two containers on my table. After overflowing tins caused me to scrub my crappy oven halfway through the baking process, the cakes stuck to each of the baking dishes I used. I had little hope.

On Friday morning (thankfully classes started at 12 that day) I began shaping my train. I was holding my breath, praying that I wouldn't have to do a last minute dash to the store and shape some supermarket cakes instead - bluerrggh! But the heaven's heard: a couple of hours later I had train shaped chocolate cake. I wanted to cover the cake in a thin layer of ganache to stop any crumbs getting into the cream I planned to cover it with. Of course, I ran out of ganache half way through this process. Dad to the rescue - ran to the shop and picked up more cream and chocolate. Came back. Brought 'almond chocolate'. COME ON! 'It's the only one they had. The lumps will come out when you melt it!' he says. Oh daddy.
Anyway, stuck for options I made the almond ganache and lumpy almonds and all it worked alright.
That evening I got decorating! Then realised that my main train piece (sorry, not up with mechanisms of transport) was in the CENTRE of the tray I was using. This was not going well.. but dad came to the rescue (and this time in the right way) and suggested I use the 'lip' of the tray as a hill, and have my carriages going over the hill and onto a second tray!
So got decorating, covering bits with coloured cream and writing number ones. Of course, at this time I didn't have enough room in the fridge for two trays so the decorating of the last carriages came on Saturday morning, just in time.

I couldn't have been happier with my train! The first cake I've liked 100% :) My sister brought a Bananas in Pyjamas cake made by her friend which was also delightful!


The cake was received with continuous compliments and tasted absolutely delicious - moist, rich and super-doop chocolatey! 


To accompany the cake a lady from Registration and Licensing (how fitting) told us how to make little chocolate cars - milky bars with smartie wheels, tiny teddies and smartie steering wheels! We used sliced candy-filled licorice instead of smarties for wheels which we found to be even sweeter - tyres! They looked great with my cake and tasted the way children's party food should - full of sugar, super sweet (oh, and bite sized)!

Thursday, 19 April 2012

Happy Easter!

Our first easter living away from home was full of love :)
We welcomed easter morning with a bacon and egg breakfast at home in our pyjamas before heading out to visit our families. The day before I had had my first shot of making my own hot cross buns, they're a favourite of mine and turned out quite nice! We took them to share with our families and were greeted with way too much chocolate and plenty of other delicious treats.


Hot Cross Buns
Ingredients
1 1/2 cups (375ml) warm milk
2 tsp (7g/1 sachet) dried yeast
1/4 cup (55g) caster sugar
60g butter, melted
1 egg, lightly whisked
4 1/2 cups (675g) plain 00 flour
1 tsp salt
5 tsp mixed spice
1 cup (170g) sultanas
1/4 cup (45g) currants
1/4 cup (50g) mixed peel
1/3 cup (80ml) cold water
1/2 cup (170g) apricot jam
Note: I found a packet of mixed sultanas, currents and peel and substituted the fruit with approximately 2 cups of this.


Method
1. Combine milk, yeast and 1 tbs of sugar. Set aside in a warm, draught-free place for 10 minutes or until frothy.

  1. 2. Combine the milk mixture, butter and egg and whisk to combine. Combine 4 cups (600g) of flour, salt, mixed spice and remaining sugar in a bowl. Add the sultanas, currants and mixed peel and stir to combine. Make a well in the centre. Pour in the milk mixture and use a wooden spoon to stir until just combined, then use your hands to bring the dough together.

3. Turn onto a lightly floured surface and knead for 10-15 minutes or until smooth and elastic. Place the dough in a bowl and cover with a damp tea towel and place in a warm, draught-free place for 1 hour or until dough doubles in size.
4. Preheat oven to 200°C. Grease a 23cm square cake pan. Punch the dough down with your fist. Turn dough onto a lightly floured surface and knead for 2-3 minutes or until dough is smooth and elastic. Divide dough into 16 even pieces and shape each portion into a ball. Arrange dough portions, side by side, in the prepared pan. Set aside in a warm, draught-free place for 30 minutes or until dough has risen 2cm.
5. Meanwhile, mix the remaining flour and water together in a small bowl until a smooth paste forms. Place in a small plastic bag and snip off the end. Pipe a continuous line down the centre of each row of buns, lengthways and widthways, to form crosses. Bake in preheated oven for 10 minutes. Reduce heat to 180°C and bake for a further 20 minutes or until golden and cooked through (buns are ready when they sound hollow when tapped on the base).
6. Turn onto a wire rack. Place the jam in a small saucepan over high heat. Cook, stirring, for 2 minutes or until jam melts. Strain through a fine sieve. Brush hot jam over the buns.


I let my 'warm' milk get too hot, killing the yeast when I added it. This meant the milk mix did not get very frothy, and the dough didn't rise. This turned out to be just fine - I made mini hot cross buns rather than the traditional large ones, and the poor yeast just meant I had very dense, super fruity little buns!
  • Great served with a cup of tea and toasted warm with a spread of butter!

Playing House

I'm lucky enough to have the opportunity to house sit with my boyfriend this month. The second time we have, and I can't help but feel like I'm 'playing house'! Our little family consists of the two of us, Lola the cat and our chickens Claude and Cairo. It's comfortable, close to everything and very exciting playing real grown ups for a month :D
The best thing about our little adventure is the cooking! We've made roasts, pancake breakfasts, soups, the list goes on. I've even had the pleasure of Matt making me his signature pasta when I'm too tired to move after work! As our time comes to an end I'm thinking about those meals that stood out. 


I've got to tell you about this sticky date pudding. I love dates, but I've never found this popular dessert appealing and when I've tasted other peoples I've never been impressed. I went on a camp recently and was cooked sticky date pudding en masse for dessert. Catering for 50 people usually means giant tubs of ice-cream and dried out pudding, but boy was I in for a treat. 
This sticky date pudding is life changing. I have been totally, irreversibly converted. I went straight home from the camp and served it the next day for dessert at a dinner party we hosted. Here is the recipe, I guarantee you won't turn back.


Life Changing Sticky Date Pudding
from Stephanie Alexander, thanks to Rob!
Serves 6 generously
Ingredients
170g dates, pitted and chopped
1 tsp bicarb soda
300ml boiling water
60g butter
3/4c brown sugar
2 eggs
170g SR flour
1/2 tsp vanilla extract
Sauce
200g brown sugar
1/2c thickened cream
125g butter
1 vanilla bean or substitute 1tsp vanilla extract


Method
Preheat oven to 180C and grease an 18cm square cake tin.
Mix dates, bicarb and boiling water and leave to stand.
Cream butter and sugar, add eggs one at a time and beat well.
Fold in flour then stir in date mixture and vanilla.
Pour into cake tin and bake for 30-40 minutes until inserted skewer comes out clean!
The top of the cake will have a thin crust, slightly darker than the inside. The centre should be soft, but not liquid.
To make the sauce mix all ingredients together in a saucepan and simmer for 5 minutes.
Pour a little sauce over warm pudding and return to oven for a few minutes.
Serve pudding in bowls drizzled with warm sauce.


The sauce is to die for, the recipe originally calls for double the ingredients but I had far too much. Any sauce left over can go into a jar and kept in the fridge - it's fantastic warmed up in the microwave and poured over icecream, on pancakes or anything else you can think of!

Friday, 24 February 2012

The View

I flicked over channels and came across a show talking about a beautiful home. They went on to show viewers the 'sky deck' which allowed visitors to admire the 'stunning view'. The house was on a hill, the view was of thousands of homes underneath them.
I was quite stunned by this smoggy view of other peoples washing and rooftops. Sure it was vast, but 'stunning'? Really?
It doesn't help that I've grown up with hippy parents, but for me stunning views means untouched forests, coastline, endless ocean, natural anomalies..

I find this issue in many new houses being built today. They choose the top of a hill for the view. But the top of the hill just shows everything that is underneath it - more and more houses.
Perhaps 'view' actually means 'vast area of visibility' and all they need to get rid of is the 'stunning'. 'With A view', perhaps. Or 'with an expansive view'. This 'stunning' business is what the problem is.

Maybe I'm just bias. When I look at my window I see the trees that completely surround my yard, held together by a tall, old wooden fence. When I look beyond the trees that block out my neighbours I see the hills in the distance that have yet to be covered with houses. I suppose I'm just lucky that I have family members who wanted to make my view look like this. But others are perfectly capable of doing the same (at least to some extent)..

Am I the only person in the world who doesn't want to look at their neighbours underwear?

Wednesday, 1 February 2012

Road Trip!

My partner and I have decided to travel the state - I feel it completely unacceptable to discover the world before I've understood what my little island of Tasmania is really like!
We decided to tackle the East Coast this summer, however so far our plans are changing as quickly as we're making them! So instead, we've decided on a no-plan trip and are going wherever the road may take us.
Being low on cash I felt the sensible thing would be to cook a tasty, easy to eat and store, snackable food.
Unfortunately, this only occurred to me the night before we were leaving. Uh oh. That rules out anything with a rising time or anything with ingredients not already in my cupboard: no pulla, no blueberry muffins.
I did some hunting through my recipes and decided on banana bread and brownies! I'm not much of a brownie fan but I've wanted to try this recipe for a while and anything with chocolate in can't turn out too bad. And I've had some bananas in my freezer waiting for me for months.
They were both pretty tasty, my partner admitted he's not raving mad for banana bread, but mine was enjoyable, tasty. He said the brownies were too 'nutty' (aka not enough chocolate), but my brother loved them.

Moist, Travel Safe, Banana Bread
http://allrecipes.com/Recipe/The-Best-Banana-Bread/Detail.aspx
1/2 cup margarine
1 cup white sugar
2 eggs
1 1/2 cups mashed banana (about 6 bananas)
2 cups plain flour
1 tsp baking soda
Preheat oven to 175 degrees C, line a loaf tin (9x5 inch approx) with baking paper.
Cream margarine and sugar until smooth. Beat in eggs, then bananas. Add flour and soda, stirring until just combined.
Pour into prepared tin and bake for about 1 hour (or until skewer comes out clean).
Remove from pan and let cool.
Note: original recipe states store in fridge or freeze, however it lasted just fine in and out of my eski while on the road!

Happy Travelling Brownies
http://www.prevention.com/weight-loss/flat-belly-diet/flat-belly-diet-recipes-82
1/2 cup plain flour
1/3 cup cocoa powder
1/4 tsp baking powder
1/8 tsp (pinch) salt
2/3 cup brown sugar
1/4 cup vegetable oil
1 egg
1 egg white
1 tsp vanilla extract
1/4 cup choc-chips
1 cup chopped walnuts
Preheat oven to 175 degrees C, line a small brownie/lamington pan with baking paper.
Combine flour, cocoa, baking powder and salt in a large bowl.
Combine brown sugar, oil, egg and egg white, and vanilla in a small bowl. Whisk until smooth.
Pour into flour mixture and stir until blended.
Stir in chocolate chips and walnuts.
Spread batter in a thin layer in the prepared pan. Bake for 20-25 minutes or until firm and inserted knife comes out with a few moist crumbs.
Let cool completely and cut.
Note: I didn't let cool, and these travelled great!